Defensive Carry banner

DIY 1911 Bobtail Question

22K views 21 replies 8 participants last post by  Exodus  
#1 ·
I think I've screwed up the courage to do my own bobtail. I bought a cheap(ish) 1911 to use a project/learner gun. The 1911 is a Griffon and has a forged slide and frame. I've already detail stripped it a couple times, and replace several parts (including the trigger) and done some shaping on the thumb safety. I think I'm up to doing the bobtail myself. My only real hesitation comes in drilling the new hole for the MSH pin. I'm going to buy the Ed Brown jig. This sounds like a stupid question, but how does the jig work? I've found lots of tales of DIY bobtails, with pictures in progress, but none show the drilling of the hole! The jig looks like it has a hole to match to the existing hole, and another hole where the new hole needs to go. I assume this will sit on top of the frame... are you meant to run the bit through the hole of the jig, or just use it to mark on the frame? I'd really like to know how the jig is meant to work before I drop the cash on one. Any insight would be greatly appreciated.

Part 2 of this question: If you have done the bobtail yourself, did you remove the grip screw bushings to drill the new hole? I know that will make it easier to lay the frame flat on the drill press, but the bushings are very well staked in - I'm thinking I'd have to use a dremel to get them out. I'm think about taking a piece of wood and drilling holes to match the bushings so I can mount the frame on my drill press.

I've already purchased a piece of flat bar stock steel. I'm going to build a frame analogue to practice on this weekend before I take the plunge.

So...anyone got some advice?

Thanks in advance!
 
#2 ·
I don't think you cut the frame deep enough to affect the MSH pin hole,I might be wrong,but i think you attach the MSH and then make your angle cut and then finish everything smooth and rounded,having a sander that you can sand on the cut with the frane perfectly flat and deburr and smooth everything by using less coarse paper for each sanding step
 
#3 ·
I've done quite a bit of home gunsmithing using jigs to install beavertail grip safties on 1911's and combat sights on Remington 870's. Jigs typically come with detailed instructions and will tell you exactly what tools are needed. Just be sure to follow the instructions to the letter and take it slow and easy. I always got excellent results.
 
#4 ·
Duk - you definitely need to drill a new hole. The old hole is cut away a part of the process.

Slim - I know they do come with instructions. I was just hoping a get an idea of what is involved in the drilling process before I buy it. I like to do my research before jumping in, you know?
 
#5 ·
I don't have any info for you, I just wanted you to know that I think it's cool you're giving it a shot. Post some before and after pics would ya? I might try this at some time if I ever work up the nerve. Good luck!
 
#6 ·
Sure thing Tim. I got a rough analogue made. Tomorrow I practice drilling, cutting and smoothing.
 
#7 ·
You take the jig and clamp it in your drill press vise. The jig needs to hang out the side of your vise jaws with the two holes in the same plane as your drill bit in your chuck. Chuck up your drill bit, and move your vise around to where you can pass the bit through the outermost hole in the jig. This is the alignment phase. Then take your uncut frame and slide it over the jig past the outermost hole and line the existing mainspring housing hole up with the inner hole on the jig and install your mainspring housing pin. Your frame will now be properly located for the drilling of the new hole. Use a center drill first to avoid bit walking.
 
#8 ·
See I don't know everything,I hope my wife never sees this post,I missed the part about the Jig,I had no idea they made one,I was thinking DIY had a hacksaw and a dremel involved in the project
 
#9 ·
Thanks Gigamortis. That make sense. I ordered the parts last night (along with Duracoat kit). Hopefully I'll be able to post some good before and after picks and not a how to spend $150 to ruin a 1911 story!

Don't worry Duk. Your secret is safe with us. Though some of us might charge you to keep it a secret!
 
#10 ·
Well, I took the plunge and did it! It turned out ugly and functional - Not bad for my first attempt! I bought this 1911 specifically to be a project gun to learn on. I don't have much metal work experience, and it shows. I am happy with the results though. I have a very functional bobtailed 1911 (I think). I still have to shoot it to test it out. I learned several things. First and foremost, a proper drill press is almost a necessity. I attempted it with a dremel workstation (that turns a dremel into a drill press), but it doesn't have enough torque to drill into the steel. So, I used it (and the jig) to mark the frame and drilled the hole by hand. Despite spending a good half hour lining up the dremel with the jig to mark the frame, I still drilled the hole on the first side off! It turns out the dremel shifted a little less than 1/8" over. So, I had to expand the hole to line up with the MSH. The instructions actually deal with that issue. Once the hole was moved, I used the jig to drill the hole on the other side of the frame perfectly. Then it is a matter of removing the excess material on the frame and blending with the new MSH (if you so choose). There is a little wave to the back of the cut from the old MSH holes. I think you would normally take a little more material off, but I'm hesitant because of my misshapen hole. I'm pretty sure it'll hold fine - it just doesn't look great. It feels great in the hand though! I also rounded of the safety a bit. All I need to do now is strip the finish and Duracoat it. And now, for a few quick pictures:

Here is the before picture:
Image


And a few after shots:

Image

Image

Image
 
#11 ·
You can clean that right up & make it perfect looking.

Start with some fairly coarse 3M Wet Or Dry Silicon Carbide paper.

Pull it really tight over a block of smooth perfectly flat hardwood & tack it to the block.

Use that to sand the frame and the mainspring housing together AKA - both at the same time & while the mainspring housing is installed in the frame.

Carefully sand and blend them both together.

Take your time & contour it & you can go right up to almost touching the mainspring cross-pin hole.

Get it cleaned up and evened up with the coarser paper & then move to progressively finer grit papers.

Finish up with Brownell's OXPHO Touch Up Blue.
 
#12 ·
Throw a little cold blue on the bare metal and it won't stand out as bad,As long as it shoots is the main thing.I don't have a lot of metalworking experience,other than some welding etc.,My wife has learned over time when she sees me with a dremel something bad is about to happen.

I would follow Qk's advice
 
#13 ·
Thanks for the advice QK. I did a little of that, but with a rasp. I'm just a little worried about getting too close to the hole. I know that most of the stress is vertical and not lateral (as the spring is pushing down, and the rail that the MSH rests in absorbs the lateral stress, but still. Not sure if the recoil would make it crack. How close is close?

I'm not going to bother with the blueing - I also ordered a duracoat kit with the bobtail parts. I'll post final finished pics once it's all done.
 
#15 ·
Looking at your PICS you can get closer than you are now.

If you have a really fine cut flat file then use that to concentrate just on those high areas first with a finer cut.

Then use a finer grit paper and use MORE time in combination with less agressive metal removal.

You don't want to get it all nice and even with a real coarse cut & then have to take off even more metal removing heavy rasp gouges - and then before you know it you will be right on top of that hole.

The way it looks to me right now it's still not too late or too far gone to make a really nice looking polished job of it.

Remember that there is not a lot of force exerted on the mainspring housing even with the hammer fully cocked.

The hammer strut is only compressing the internal mainspring which is...what??? - a mere 18 to 24 LBS.

That is irrelevant force really even if you were to actually touch the hole.

The main reason that you want to be careful and leave yourself an intact hole is that you don't want to risk deforming it when knocking that pin out and driving it back in again during assembly & disassembly...not because the mainspring housing would ever blow out the butt of the pistol due to exerted forces.
 
#14 ·
I've never heard of Griffon before, but from the looks of it, it was built to be a project gun. :wink:

I couldn't imagine a better firearm on which to test your metalworking skills!

But good on you for being brave enough to give it a go! I want to try it out on my RIA project gun, but my metalworking experience is precisely zilch.
 
#16 ·
That makes sense QK. I bought sand paper today, and will make a sanding block tomorrow. I figure I'll just go slow. I don't need to take off that much material.

Xader - It is a good project gun. Very good quality, and they always seem to run in the sub $500 range.
 
#19 ·
QK. If you did that bobtail, your work is amazing. The bevel on the side of the frame looks great. With the way I over-drilled the hole, I don't think I can do that. I got a sanding block and smoothed it down. A lot. I've got just a little concave area where the old MSH hole was. I think I've got it as close as I dare to go. The MSH is nice and smooth and it feels great in my hand. I took it to the range and it shot great! Between jams, that is. I can say the the bobtail makes a 1911 feel even better in my hand, and perceptible recoil is noticeable reduced. The jams happened with all of the mags. The spend casing would eject fine, and the new round would stick just inside the chamber with the rim of the casing just under the extractor. Every time. If I retract the slide slightly and let it go, the round would chamber. I think it is related to extractor tension. I've adjusted it a little bit, and now it runs fine in testing with snap caps. Once back from the range, I cleaned the Griffon, degreased and Duracoated it. I used a $30 Duracoat kit with a preval sprayer. Overall, I'm very happy with the way it turned out. The preval sprayer was a little inconsistent (stopping, and starting with a heavy spray) so I got a couple runs. I also had the parts a little too close together on my spraying rig and had some over-spray. With a little sanding, I got the Griffon fit back together. The exterior looks a little rough. I need to do a light spray over the areas I sanded. The pistol feels as smooth completely dry as it did fully lubed prior to the Duracoat. Once I get it finished, I'll lube it up and it should feel amazing! The duracoat also took the slight slop out of the slide - it no longer rattles!

And now, a few bad pictures:
After finishing, before Duracoat:
Image

Image

Image


I did a little more sanding on the bobtail after the previous pictures. You can see them in the after Duracoat and sanding:
Image

Image
 
#21 ·
Thanks for the encouraging words QK. Your advice has been invaluable. I'm really happy with the way it turned out, and learned a lot in the process. Nice shooter by the way. Build from the ground up?

I've been eying the Wilson slide/frame kits for a build. I've been lusting after a government size bobtail. Might just use a Springfield loaded as the starting point though. The Griffon is just an inexpensive stepping stone.
 
#22 ·
Got an update on the Griffon! I did some more Duracoating and got a better result this time. Less is definitely more with duracoat. I sanded down the high spots from my runs, masked off the rest of the gun and re-sprayed it. It turned out nice, but I got the ratio of hardner to Duracoat a little different from the first spray. So...the original coat is more glossy that the second coat. It needs a final coat of black, or a clear coat to even it out. I'm not going to worry about it now though - I want to see how it wears. Right now, the finish is functional, and this is a carry gun, it don't need to be pretty. I also hit a gun show last Saturday and picked up a Wilson Combat 20# recoil spring, Wilson Combat Bullet Proof Extractor (not installed yet), and a set of nice VZ grips. I lubed it tonight, and the Griffon feels amazing!. Nice and smooth. No rattles. I'll shoot it in a week or two when the Duracoat has fully cured.

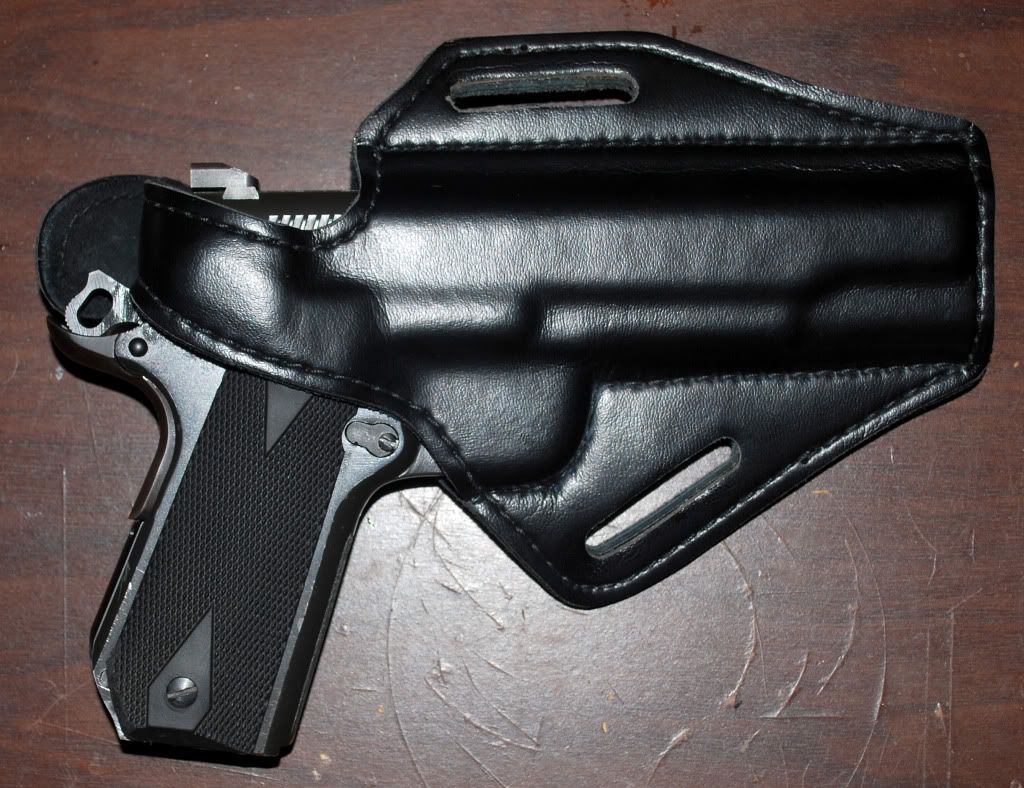
And now, a picture:
Image


I need to take some better pictures this weekend.

Anyone want to hazard a guess what this 1911 is worth now?